
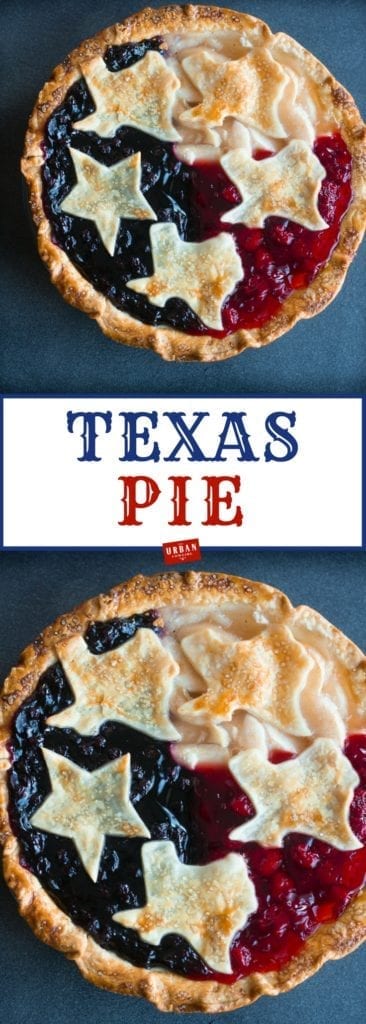
Happy Sunday gang! It’s Texas pie day!
I’m super thrilled to finally reveal this recipe, so grab a cup of coffee and get in this kitchen!
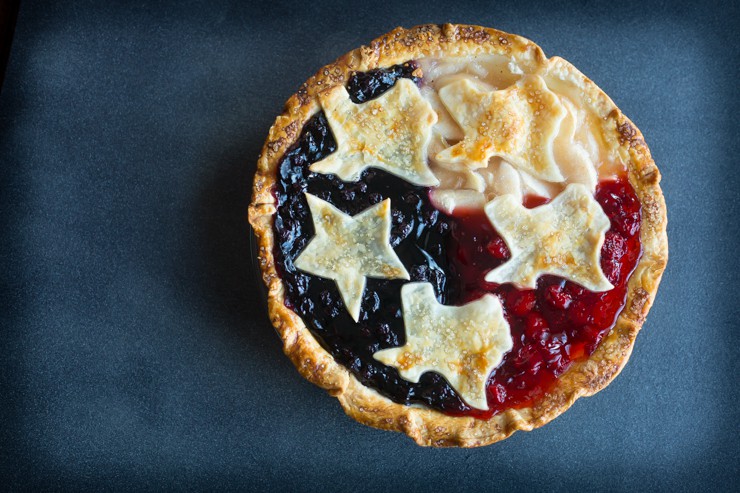
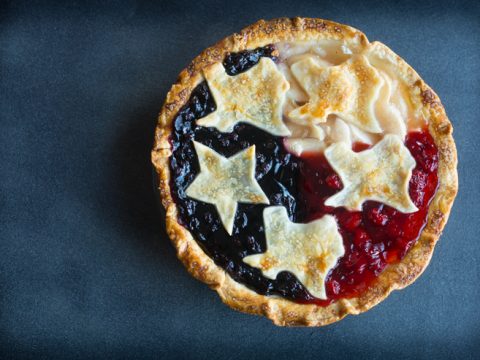
If you follow me on social media you know that I came across a photo of this pie on a Texas women’s group on facebook around Thanksgiving, and promptly fell in love. Who wouldn’t?! It’s adorable!
I started referring to it as Texas Pie and thus it shall be named forevermore.
Well, I never did track down the original author, so as promised, I whipped up a new recipe that we could all enjoy.
This recipe took a little longer to hack (because I was committed to making it from scratch), but after 5 failed pies I discovered that homemade pie filling will not work. The fresh fruit weeps and destroys the design. The fruit filling needs to be a dry jelly to maintain the structural integrity during baking. In short— it can’t contain water, which homemade pie filling surely contains in the form of fresh fruit juices.
So finally I began to play with canned and jarred pie fillings, trying different brands until I found a winner. I enjoyed name brands from the east coast for the blueberry filling, but the store brand for the apple and cherry filling was pretty dang good. Also worthy of mention, the name brand pie fillings such as William Sonoma and Cracker Barrel are terrific if you can find them.
So, take heed and use prepared pie filling for your Texas pie!
Here is the cookie cutters you’ll need! They also have the Texas cookie cutter at HEB stores.
Follow my instructions precisely and you’ll nail this design on your first shot!

Here is the recipe for the Texas Pie!
If you make this recipe for Texas Pie, TAG Urban Cowgirl on social media! I’d love to see how it turns out. 🙂

Texas Pie
This beautiful Texas pie looks stunning, but its actually easy to make! Using premade pie filling this pie can be assembled in 15 minutes and served up to family and friends for holidays and special occasions. Pledge allegiance to the pie! The Texas pie!
Ingredients
- 1 box of Pillsbury pie dough (should be 2 circles of dough inside), defrosted
- 21 oz. jar cherry pie filling
- 21 oz. apple and cinnamon pie filling
- 21 oz. jar blueberry pie filling
- 1 Texas cookie cutter, 1 star cookie cutter
- 1 egg for egg wash, and a pastry brush
- Optional: Turbinado Sugar for sprinkling on top
- 1 9-inch glass pie dish, greased
- Large piece of foil as needed for protecting the edges of the crust from rapid browning
Instructions
- Preheat the oven to 375 degrees.
- Open one package of the defrosted pie dough and place it into the greased glass pie dish.
- Open all of the cans of pie filling and place a different spoon in each one. Review the design in the picture and begin to fill the pie in as displayed with the blueberries taking up half of the pie from 6 'clock to 12 o' clock, the apples from 12 o'clock to 3 o'clock, and the cherries from 3 o' clock to 5 o' clock. Use only enough to mound the fruit up in its section and reserve the rest for another project.
- You will use all of the blueberry, but have some leftover apples and cherries... these are pretty good on pancakes for breakfast.
- Put the pie in a cool, safe place while you lay out the final piece of pie dough on a kitchen surface, sprinkled with a little flour to prevent sticking.
- Cut out 4 Texas shapes using the Texas cookie cutter (link above). Cut out 1 star or cut it freehand with a knife.
- To finish the pie, place the star over the blueberries in the upper corner. Get it just where you want it and then lay the Texas dough sections down around the pie to fill in. Crimp the edges of the pie and make any final adjustments to make it look pretty.
- For the egg wash, beat an egg in a coffee cup, thinning with water if necessary to make spreadable.
- Using the pastry brush, brush all of the dough. Sprinkle with sugar if desired. The sugar increases browning and you will likely have to use the foil method to protect the crust from over-browning at some point, but the sugar garnish looks extra professional!
- Bake the pie dough for 40 minutes. If at any time the outside crust begins to get very dark remove the pie and gently scrunch the foil around the edges. It just needs to cover up the surface of the crust to protect it from browning any further. This will allow the crust over the fruit to continue to bake (it takes a little longer.) You may add 10-12 minutes longer if needed to finish browning the crust, depending on your oven.
- When done, remove the pie and serve as usual. Vanilla ice cream is the best accompaniment with hot pie!
Nutrition Information:
Yield:
10Serving Size:
1Amount Per Serving: Calories: 507Total Fat: 21gSaturated Fat: 7gTrans Fat: 0gUnsaturated Fat: 12gCholesterol: 41mgSodium: 348mgCarbohydrates: 77gFiber: 3gSugar: 15gProtein: 5g
These nutritional values are an estimate only and provided as a courtesy. Different brands of ingredients may result in different calorie counts, and the software does not account for these differences. Consult with your dietician or doctor for precise nutritional values.
https://tawk.to/hootenany5
Sunday 20th of October 2019
Hi there very cool site!! Guy .. Excellent .. Superb .. I will bookmark your site and take the feeds also? I'm happy to seek out a lot of helpful information right here within the post, we'd like develop extra strategies on this regard, thanks for sharing. . . . . .
https://forum.teamspeak.com/members/414107-forumanti3
Monday 23rd of September 2019
Yay google is my world beater helped me to find this great internet site!
Andrea
Sunday 2nd of July 2017
this pie looks incredible, the fact that you use two berries IS beyond amazing not only that but it is also so pretty too look at. like beyond pretty. this is the perfect for 4th of July!!